February
Technique of the Month
Glacier Star
"We're very pleased to offer the Judy Niemeyer Technique of the Month program. This is available through Certified Shops only. If you missed out on February's Technique of the Month lecture, or if you need a review, here is what was covered in class ...
Click Images to Enlarge:

Glacier Star
Pattern for Technique #2

Glacier Star Quilt

Curved Flying Geese around center of Quilt

Today we are creating the Flying Geese

Completed Flying Geese Unit

Instruction Sheet
These are excellent instructions, read through them before beginning

Today you are working on Unit B

This is Unit B
You will be piecing your units on this foundation paper

This is your template cutting paper for your
background fabrics

Template B-1 is for your geese fabrics

Your Instructor: Jan Bressler
is ready to begin class...

Page 2 of the Instructions

Please Note:
There is a correction in your cutting on page 2
Your background strips should be cut 14 inches

After your background fabrics are cut to size...
Lay your template cutting paper on top of your fabrics

A bit of glue stick may help hold your template cutting pattern in place
You are ready to cut out your background fabrics
for your flying geese units:

Be certain to cut on the Cutting Lines
The Cutting Lines are numbered
Start with Cutting Line Number One
Keep your cut fabrics organized:

Place a binder clip on each stack of fabrics
as soon as you cut it out
Continue to Cut:

Cut along Line 2 and so on
until all of your background fabrics are all cut

Page 2 includes a stacking diagram
Follow this diagram to keep your cut fabrics in order

As the background fabrics are cut...
They are stacked together according to the pattern directions

Jan continues to cut and stack all of the background fabrics

This is not a template...
Discard this stack or save for a future scrap quilt
You are now ready to cut your Geese Fabrics:

Your geese fabrics are cut into triangles

You will have 5 different geese fabrics
Do not use the B-1 Triangle Template...

Stack the geese fabrics...
Cut the stack on the diagonal...

Then cut it again on the other diagonal...

You will now have 4 stacks of geese fabrics

Remove the top 2 triangles from each of the stacks
These will all be Fabric 1 triangles

Use a binder clip to keep them organized

Again, remove the top 2 triangles from each of the stacks.
They will all be Fabric 2 triangles

Continue to sort and clip together all of
the geese triangles

Jan is following the diagram on pattern page 2
Stacking your fabrics in order will help keep you organized
when you begin the paper piecing process

This is what your work table should look like at this point.
Background and Geese Fabrics all cut out and stacked together.
Unit B Paper Foundations cut out and ready to sew on.
Unit B Paper Foundations:

Fold every Unit B Paper Foundation on Line 1
We are working assembly line fashion

Place a dab of glue stick on the back side of section 1
This will help hold your goose fabric 1 in place

Place your goose fabric triangle face down on the table

Place your folded paper pattern on top...
Leave a 1/4 inch seam allowance showing beyond the paper
Place your background fabric face up on the table:

Place your goose triangle and pattern on top.
Note: Jan is showing you the exact placement of your fabrics.
They must extend beyond the paper.
Keep your fabric and paper pattern units organized:

Stack them together like this...
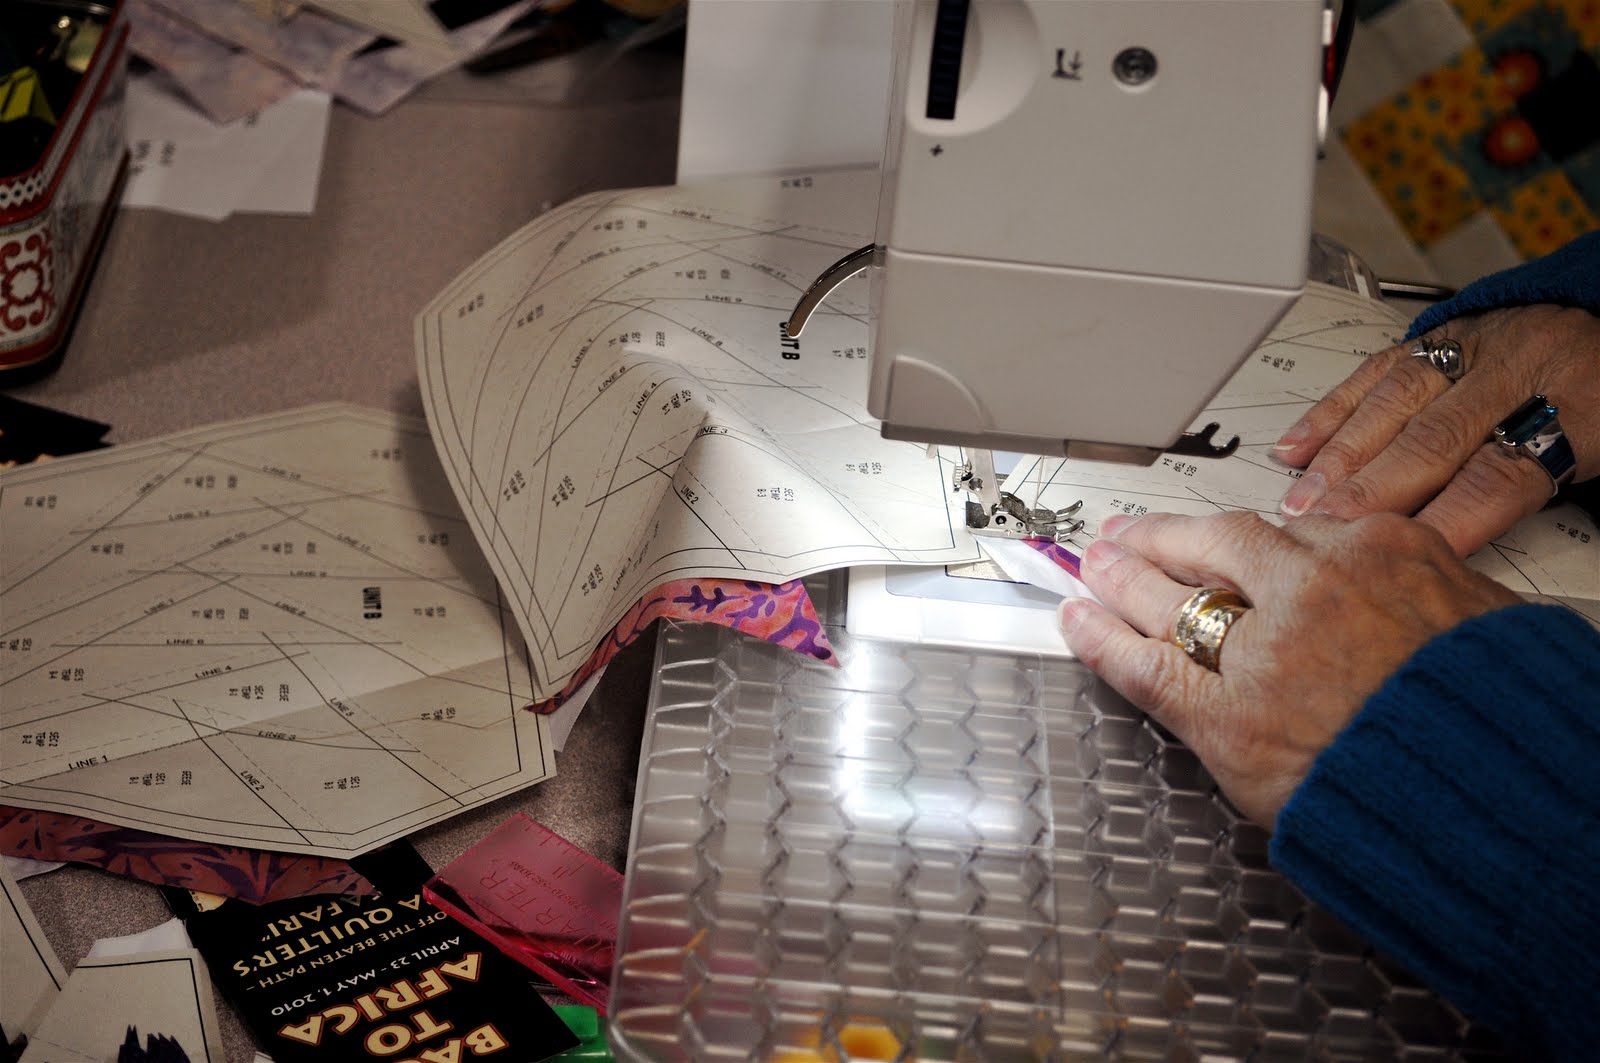
We are working in an assembly line fashion:

All of your fabric and paper units are ready for the sewing machine

Begin by stitching on Line 1
Note: Be certain your are on stitching Line 1

Only stitch along line 1
Stop at the end of Line 1
Chain piece all of the units on Line 1
This helps you work more efficiently.
After all the the Line 1 piecing is complete:

Press open the seam on each unit.
Following the pattern diagram:

Continue piecing on all of the sewing lines...

This is the back side of Unit B
All of the fabrics have been pieced
You are now ready to trim Unit B:

Note: Cut along the outer line.
The outer line is the actual cutting line

Continue to trim all of the sides...

This is what the trimmed unit looks like

This is where the flying geese unit is located on your quilt

JanniLou Creations has Glacier Star Kits Available...
Come into the shop and pick one up and join the class !

January & February Units up on the Design Wall

New York Beauty Units & Flying Geese Units
See you March 26 for Part 3
Technique of the Month
Glacier Star
This Tutorial Courtesy of:
JanniLou Creations Quilt Shop
Philomath, Oregon
CLICK HERE to read the Glacier Star Class Description
CLICK HERE to view Part 1
CLICK HERE to view Unit E Trimming Demo
CLICK HERE to view Curved Piecing Tip
JanniLou Creations
No comments:
Post a Comment